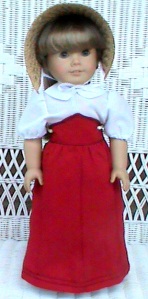
I would encourage you to check out this awesome website where I found the tutorial for the basic skirt www.patternsthatfityou.com. There are all kinds of great tailoring tips and online classes. I’ll reiterate the instructions here (for myself as much as for you) just in case it disappears someday. (Go to their home page and click on the 6 Gore Skirt Pattern Class on the right side. It’s free, but you need to add it to your cart and complete the process.)
I’ve added my own instructions for both a high pointed waistband and a high straight waistband to use with this skirt. The original uses a regular waistband and those instructions are also included here.
All these patterns are drafted from your custom measurements. Once you create the pattern pieces they can be used again and again with ease. This pattern also adapts well to shortening for a more modern look, and the addition of ruffles for…well, you just can’t go wrong with ruffles! Now a note about pattern paper…..I don’t recommend using newspaper as the ink may ruin your fabric. I use freezer paper and tape it together if it isn’t wide enough. You can also buy paper and lightweight, see through fabric made especially for drafting patterns at most fabric stores. Kraft paper, wrapping paper (with the white side against the fabric), paper grocery bags, etc. are also possibilities. I like the freezer paper because I don’t have to worry about ink bleeding onto the fabric, I can write and see pattern markings easily, its pretty durable, fairly wide, and cheap. The other advantage is that the waxy side can be ironed to the fabric as a temporary stabilizer when dealing with small pieces for applique, etc.
The measurements listed here in red will fit any 18″ doll, including American Girl dolls.
1. Measure your WAIST (A.), HIPS (B.), and the LENGTH (C.) from your waist to the floor, or whatever length you wish. Also note the measurement from your WAIST TO HIPS (D.).
(18″ Doll…W=11″ , H=12.5″, L=10″, W to H=1.5″)
2. Divide your WAIST measurement by 6. Draw a straight line at the top, center of your pattern paper with the new measurement. (Example: W = 30″/6 = 5″….draw your line 5″ long.)
(18″ Doll…W=1 7/8″, H=12)
3. Draw a straight line down from the center of the waist measurement line to make a “T”. This vertical line will be equal to your LENGTH measurement.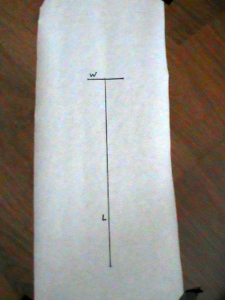
4. Measure the distance from your waist to your hip and mark this on the pattern. Draw a horizontal line perpendicular to the waist line. The length of this line will be your HIP measurement divided by 6 plus 1/4″.(Example: H = 42″/6+1/4″ = 7 1/4″) So the line on the pattern for me would be drawn 6″ below the waist line and be 7 1/4″ long. The hip line is normally 8″ below the waist, but mine is 6″ below my waist because I’m short.
(18″ Doll…W to H= 1 1/2″)
5. Using a yard stick, draw in the lines for the sides of the gore, connecting the waist and hip lines. Then draw in the bottom hem line.
6. “At the top center of the “T” measure down 1/4″ and make the slight waistline curve. The outside edges of the bottom are measured up 1/4″ each and the slight hemline curve drawn.” I didn’t make the waistline curve, but I did make the hemline curve. Otherwise, your hemline will be slightly pointy where the seams are. (See picture above.)
7. Now, draw in an extra 5/8″ on the waist and sides for seam allowances. Add an extra 3″ for the hem at the bottom. Line up the vertical center line with the straight grain of the fabric.
(18″ Doll…use 1/2″ seam allowances and a 1″ hem allowance.)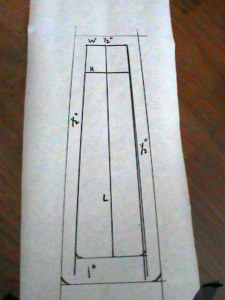
8. Cut out 6 gores of fabric. Stitch the gores together with the right sides of the fabric facing each other. Decide which seam will be your back or side opening and leave the top 7″ of that seam unstitched.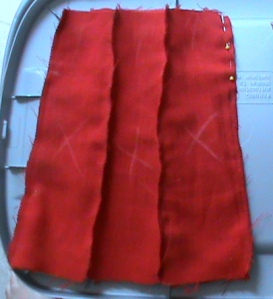
9. Make sure to finish the seams inside the skirt with french seams, or a zig zag, if you didn’t use a serger. 
10. Now its time to choose which style waistband to draft….
*****For the regular waistband: Draw a line on pattern paper measuring W + 1 1/2″. (Example: W = 30″ + 1 1/2″ = 31 1/2″) The width will be 2 1/2″. Measure up 2 1/2″ from your first line and draw a parallel line the same length. Fold the fabric in half lengthwise, wrong sides together and iron a crease. Move on to step 11. (18″ Doll…W=12 1/2″)
*****For the straight high waistband: Draw a line on pattern paper measuring W + 1 1/2″. (Example: W = 30″ + 1 1/2″ = 31 1/2″) Decide how high you want the finished waistband to be. Then double the measurement and add 1 1/2″. (Example: Height = 4″ x 2 + 1 1/2 = 9 1/2″) Draw a line parallel to the first using the total measurement. (If using the example, the lines would be 9 1/2″ apart.) Fold the fabric in half lengthwise, wrong sides together and iron a crease. Move on to step 11. (18″ Doll…W=12 1/2″ and Height = 4 1/2″)
*****For the pointed high waistband: Draw a line on pattern paper measuring W + 1 1/2″. (Example: W = 30″ + 1 1/2″ = 31 1/2″) Decide how high you want the point on the finished waistband to be, as well as the height you want the tapered part of the waistband to be and the center of the first line. Draw a dotted line parallel to the first, at the height of the tapered measurement and a dotted line intersecting both in the center (See picture E.).  Next, place two dots on either side of the center line at the top of the point at the height you want the finished point to be. Measure from hip bone to hip bone, center the measurement on the center line, and make a dot on the taper line where your hips would be. This will be the place where the point meets the waistband on either side. Use a ruler to connect the dots and make a point. (See picture F.)(Please ignore my markings on the pattern piece in the next picture, but it will give you an idea what I’m talking about.)
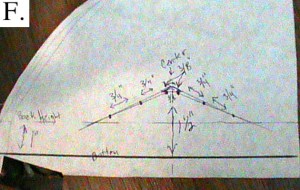 Now add a 5/8″ seam allowance all the way around.(See picture G.)
(18″ Doll…W= 12 1/2″, Tapered Height= 1″, Center= 6 1/4″, Point Height= 1 1/2″,
Hip Width= 3 1/2″, Seam Allowance= 1/2″)  Here’s a picture of what is should look like finished. (All the markings aren’t shown on this one and the black pieces are tape.)
 Cut 2 of the pointed waist pattern and add interfacing to one of them.
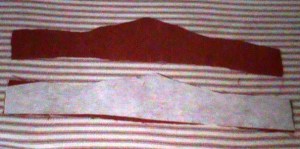 Stitch the top of the two pieces together, right sides together. Open up the short ends, fold in 5/8″ and iron. (Do the top stitching after attaching the waistband to the skirt. I used a zig zag top stitch in black thread for a detail contrast, but you could use a straight top stitch with matching thread .) (18″ Doll…fold in the ends 1/2″.)
 11. Pin the back of the right side of the waistband to the wrong side of the skirt, making pleats as you go leaving a 1″ overhang on one end, and stitch.
 Fold the waistband up, iron the long side of the front of the waistband under 5/8″. Place the folded side on the front of the skirt and top stitch to finish the waistband. (18″ Doll…be sure to use 1/2″ seam allowances instead of 5/8″.)
12. Now add the zipper, and a hook and eye. (18″ Doll…Stitch velcro to the waistband instead.)
Here’s an easy tutorial on installing a zipper. I don’t recommend using scissors to open up the seam, though…use a seam ripper.
13. Try on the skirt and decide exactly where you want the hem to be. (I always save this step for last to make sure the hem length is correct.) Here’s a tutorial for a blind hem, or another tutorial for a double fold hem. I usually prefer a double fold hem, and will use a decorative top stitch in a zig zag or scallop pattern for interest. Clip all your threads and you’re finished!
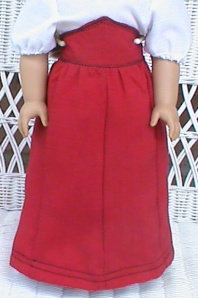
This is the back…..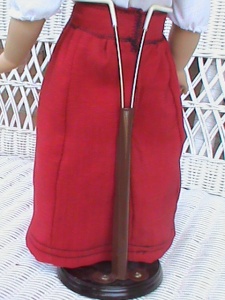 The straight high waist…..
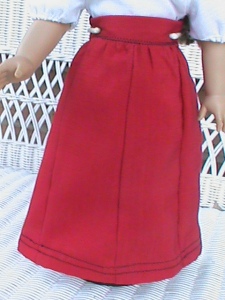 And the pointed high waist…
 This is a picture of my first skirt (right) with the regular waistband, and the pattern (left) I drafted for it. I’ve used this pattern again and again.
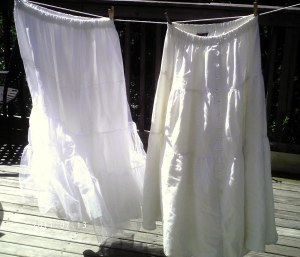
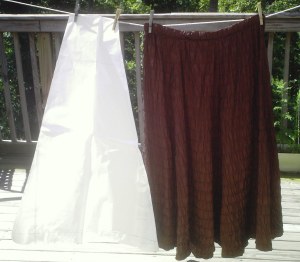 These are the petticoats I wear under the skirt. The one on the left is made from an old bed sheet with a tulle flounce salvaged from an old wedding crinoline that was falling apart. The one on the right is a skirt from a thrift store. I removed the buttons down the front and stitched it closed. Both have elastic waists. I wear the one on the right under the one on the left which goes under my brown skirt.
P.S….You can make this a 3 or 5 gore skirt by dividing your waist and hip measurements by either 3 or 5.


You have become such a beautiful seamstress Heid. I can tell you really love it too. 🙂
Thank you for the very useful tutorial! Using the doll as a model was a great idea.
Thanks. I'm glad you liked it. Its nice to kill two projects with one blog post! My daughter was bugging me for doll clothes and I promised this tutorial to someone in the Empire.